Run Sonarr via Docker on Synology DSM 6.0
With Synology DSM 6.0 and upwards Docker is natively supported and this allows you to easily configure services without having to download or manually install services. The first step is to get Docker installed via the Synology Package Center:

Once Docker is installed, you can simply search for the relevant image and install via the registry:

In my case the installation of the images did not work via the web-interface and I received a meaningless “Operation failed” error. If you experience the same you need to connect to the Synology via Terminal (SSH or Telnet) and then install the images manually:
docker pull linuxserver/sonarr
Once you have installed the images (it does not matter if you do this via the command line or the web-interface), you can configure the Docker container:
How to get the PGID and PUID
Sometimes when using data volumes (-v flags) permissions issues can arise between the host OS and the container. Those issues are avoided by specifing the user PUID and group PGID. Just ensure that the data volume directory on the host is owned by the same user/group and it will “just work”. You will again need to get onto a terminal session on the Synology and then look at the content of two files:
The PGID can be found via a “cat /etc/group” and then look up the PGID for the admin group (in my case below the PGID is “101”):
MuffinStation> cat /etc/group
administrators:x:101:admin
avahi:x:84:
...
The PUID can be found via a “cat /etc/synouser.conf” and then look up at the PUID for the admin user (in my case below the PUID is “0”):
MuffinStation> cat /etc/synouser.conf
admin:0:
guest:0:
...
Configuring Sonarr for Docker on Synology
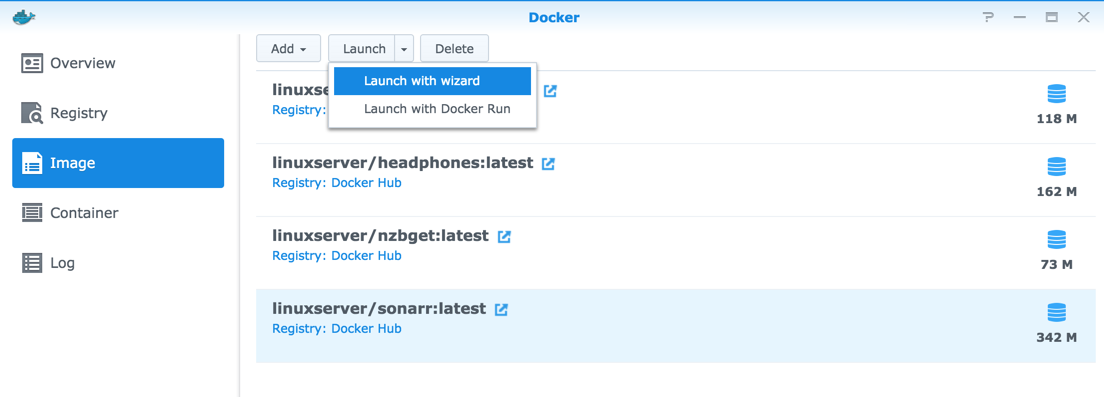
From the “Image”-tab select the sonarr:latest image and then click on “Launch with wizard”:
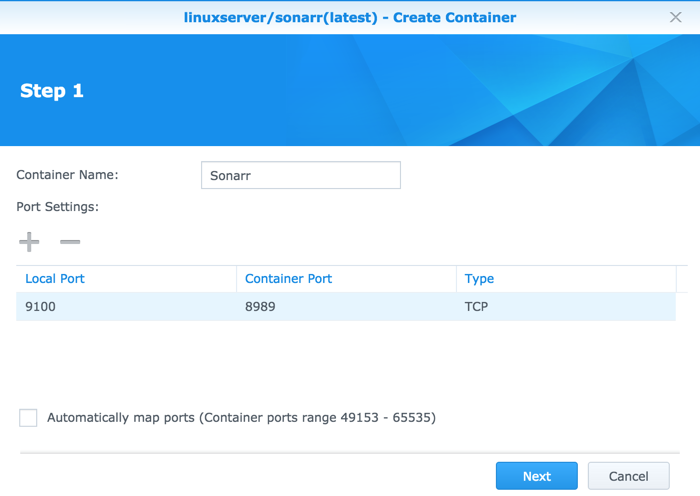
In the first step you want to map the NZBGet internal port (8989) to an external port (I chose 9100, but you can also have the local and the container port be the same):
In the second step you can leave the defaults as is (if you notice too high resource usage, you can alway adjust it later on):

In the “Summary” step you need to click on “Advanced Configuration” to make some adjustments:

In the Volume-settings you need to create a “docker/sonarr” folder which will store the Sonarr configuration and database:

You will configure several Volumes and mounts. The Sonarr Docker image requires “/downloads” (which points contains completed downloads of Series from NZBGet), “/tv” (which points to the stored TV-series on your Synology) and “/config” which contains the Sonarr configuration and database. The way Docker images work is that you assign a Synology volume to a “Docker mount”. The “Docker mount” is pre-configured with a “hard-coded” name and you must not change the “Mount path” name as the exact naming is required by the Docker image to work:

The last step requires you to configure the environment variables for PGID, PUID and time-zone:

Once you saved the configuration you can start the container and then access Sonarr for further configuration via the Local Port you configured above.
Synology indexer is inaccessible via Docker
I have not been able to find solution which runs without “hacking” the Synology for the indexer to work. Since the Docker image runs isolated from the rest of the system, it will not have direct access to the Synology indexer and even if it had, the Synology indexer would not understand the mapped mounts.
I have implemented the Simple Synology NAS Media Index Server which is hosted on Github: https://github.com/racklin/simple-synoindex-server.


Recent Comments